Help:Tools/UKMM: Difference between revisions
→Installation: Further break down installation instruction groups |
→On Steam Deck and macOS: Install CMake |
||
| Line 48: | Line 48: | ||
# Install Rust: you can do this by opening a terminal and running the command <code>curl –proto ‘=https’ –tlsv1.2 -sSf https://sh.rustup.rs | sh</code> - what this does is download the <code>rustup</code> tool for managing and building Rust applications. It will ask you to enter a number, 1-3. You want to type 1 and then hit enter. | # Install Rust: you can do this by opening a terminal and running the command <code>curl –proto ‘=https’ –tlsv1.2 -sSf https://sh.rustup.rs | sh</code> - what this does is download the <code>rustup</code> tool for managing and building Rust applications. It will ask you to enter a number, 1-3. You want to type 1 and then hit enter. | ||
# Install CMake: you can do this on macOS by installing the dmg for your system, or on Linux by running the sh for your system, both available from [https://cmake.org/download/ here]. | |||
# Download [https://github.com/GingerAvalanche/ukmm/archive/720eebd89c7e5f3d651e5f76db9dcac20cf9d282.zip this version of ukmm] (There is a more up-to-date version, but it contains things you don't want, because functionality was removed in order to implement it a different way, later) | # Download [https://github.com/GingerAvalanche/ukmm/archive/720eebd89c7e5f3d651e5f76db9dcac20cf9d282.zip this version of ukmm] (There is a more up-to-date version, but it contains things you don't want, because functionality was removed in order to implement it a different way, later) | ||
# Extract that zip somewhere. It doesn't matter where. It could be on your desktop, if you want | # Extract that zip somewhere. It doesn't matter where. It could be on your desktop, if you want | ||
# Go into the folder. You know you're in the folder when you see things like <code>assets</code>, <code>book</code>, <code>crates</code>, <code>src</code>, etc in your finder window. | # Go into the folder. You know you're in the folder when you see things like <code>assets</code>, <code>book</code>, <code>crates</code>, <code>src</code>, etc in your finder window. | ||
# On macOS, control-click the folder name in the path bar, and select Open in Terminal (If the path bar isn't visible, select View -> Show Path Bar | # On macOS, control-click the folder name in the path bar, and select Open in Terminal (If the path bar isn't visible, select View -> Show Path Bar). On Steam Deck, open Konsole and then use the <code>cd [path]</code> command (replace <code>[path]</code> with whatever is in the path/address bar in step 5) | ||
# Enter the command <code>cargo build --release</code> - wait for it to finish. This might take a while | # Enter the command <code>cargo build --release</code> - wait for it to finish. This might take a while | ||
# Go into the <code>target</code> folder | # Go into the <code>target</code> folder | ||
Revision as of 20:05, 12 November 2024
| Author(s) | Nicene Nerd, Ginger |
|---|---|
| Source code | https://github.com/GingerAvalanche/ukmm |
| License | GPLv3+ |
| Written in | Rust |
| Platform support | Cross-platform |
UKMM (UKing Mod Manager) is an updated mod manager for BotW. It is used to install and uninstall mods, and solves many mod conflicts. It was created to solve bugs that fundamentally couldn't be solved by BCML, due either to limitations in the Python programming language or early design choices in BCML.
BCML or UKMM?
BCML was designed to generate RSTB entries, and grew over the years to become something much larger and more clunky than was originally intended. UKMM was built from the ground up, by the same devs who wrote BCML, to be a complete mod manager for all forms of BotW, so it performs much better.
Which one should you use? Except for a few very rare exceptions, you should always use UKMM.
Why use UKMM?
- It's easier to install
- It gives you more control over where your mods are deployed and how they're deployed there
- It doesn't force a remerge every single time you change anything. You can install 30 mods with UKMM and choose to only merge one time, at the very end, if you want. BCML would go through a long, full remerge process every single time, increasing the amount of time you spent not playing
- It doesn't need to fully remerge every single file when you install something. BCML could never manage to merge only the files required by changed mods without breaking something. UKMM can do it just fine, so installing small mods doesn't take 2 minutes if you have a large mod installed
- It merges any given file faster than BCML can merge the same file
- It merges more file types, meaning mods are more compatible than before
- It fixes several things about animation and AI merging, increasing compatibility between mods that edit those things.
- It generates proper RSTB entries for all assets, resulting in no crashes or panic blood moons related to file size (Some panic blood moons may remain if you use certain mods that increase the system load by a large amount, but even these mods will be more stable with UKMM)
- It supports dumps as WUA files if you're using Cemu
- It is a lot more strict with the files it accepts than BCML is, which means that you are far less likely to see an infinite loading screen or crash. Instead, you'll see an error in UKMM which will (almost always) tell you exactly what is wrong
When should I not use UKMM?
- You're using Dark Army Resurrection
- You're using the online multiplayer mod
In all other cases, use UKMM
But I found a bunch of tutorials for BCML!
That's because BCML needed them, because it was difficult to set up.
Installation
On Windows and Linux
Unlike BCML, installing UKMM is simple
- Download the executable archive for your system from the current UKMM releases page
- Extract the executable from the archive to just about anywhere on your computer
- Run the executable
If you're on Linux and receive an error when trying to run it, perform a system upgrade and try again. If you can't perform a system upgrade, you're using a static distro of Linux like steamOS and need to use the instructions for Steam Deck
On Steam Deck and macOS
Due to reasons outside the developers' control, the Linux For Steam Deck and macOS versions currently cannot be built by them. They must be built on the system that it going to be using them. The following directions detail how to do this
- Install Rust: you can do this by opening a terminal and running the command
curl –proto ‘=https’ –tlsv1.2 -sSf https://sh.rustup.rs | sh- what this does is download therustuptool for managing and building Rust applications. It will ask you to enter a number, 1-3. You want to type 1 and then hit enter. - Install CMake: you can do this on macOS by installing the dmg for your system, or on Linux by running the sh for your system, both available from here.
- Download this version of ukmm (There is a more up-to-date version, but it contains things you don't want, because functionality was removed in order to implement it a different way, later)
- Extract that zip somewhere. It doesn't matter where. It could be on your desktop, if you want
- Go into the folder. You know you're in the folder when you see things like
assets,book,crates,src, etc in your finder window. - On macOS, control-click the folder name in the path bar, and select Open in Terminal (If the path bar isn't visible, select View -> Show Path Bar). On Steam Deck, open Konsole and then use the
cd [path]command (replace[path]with whatever is in the path/address bar in step 5) - Enter the command
cargo build --release- wait for it to finish. This might take a while - Go into the
targetfolder - Go into the
releasefolder - Run the file called
ukmm
Setup
There are two methods of setup, depending on whether you are coming from BCML or are just starting out
Importing from BCML
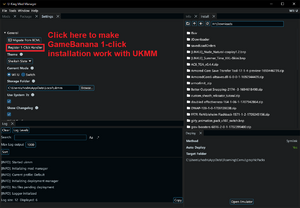
If you previously used BCML and it worked for you, congratulations! Your job is easy. Go to the Settings tab, click Migrate from BCML. Wait for it to finish. There you go! All done!
Manual Setup
If you've never used mods before, or are installing mods for the first time on a new computer, or wiped BCML, or whatever other reason, you will need to set your settings manually
General
You should have a dump of your game on your computer. If you do not, go dump your game and come back.
| Setting | Description | What you should set it to |
|---|---|---|
| Current Mode | Determines which layout of the folders and files UKMM will use | Wii U console or Cemu? Use Wii U. In all other cases, use Switch. |
| Storage Folder | Where UKMM stores mod data, including mods, profiles, merged data, pending deployment data, etc. | Leave it as the default unless you know what you're doing. |
| Use System 7z | Uses the version of 7zip installed to your computer, if one is present. Recommended, because the actual 7zip program is faster than UKMM's internal 7zip code. | Checked |
| Show Changelog | Show a summary of recent changes after UKMM updates | Checked |
| Language | Which language pack UKMM merges mod text into | Whatever language you have set in your game/emulator. Make sure it is both the same language (the lower-case letters) and region (the upper-case letters). |
Game Dump
If you're using Cemu and you installed your game/update/DLC with it, click Import Cemu Settings, and select the folder that contains Cemu.exe. You're done.
Otherwise, consult the following table.
| Setting | Description | What you should set it to |
|---|---|---|
| Game Dump (Only WiiU) | How your game files are stored, as an unpacked collection of loose files or as a WUA | Self-explanatory |
| Base Folder (Switch or WiiU Unpacked) | Where you store your Base Game dump. | The folder named content inside your game dump. Should look like C:/some/path/content/, where C:/some/path is something only you know.
|
| Update Folder (Switch or WiiU Unpacked) | Where you store your Update dump. | The folder named content inside your update dump. Should look like C:/some/path/content, where C:/some/path is something only you know.
|
| DLC Folder (Switch or WiiU Unpacked) | Where you store your DLC dump. | The folder named 0010, inside the content folder in your DLC dump. Should look like C:/some/path/content/0010, where C:/some/path is something only you know.
|
| WUA Path (Only WiiU WUA) | Where you store your game WUA. | The path to your BotW WUA file. This is something only you know. |
If using Cemu, the three unpacked path folders can be found by right-clicking on the game in the game list and selecting the appropriate option. For Base and Update, use the content folder. For DLC, use the 0010 folder inside the content folder.
Deployment
| Setting | Description | What you should set it to |
|---|---|---|
| Deploy Method | How UKMM deploys the mods after they've been merged | Are you on a console? Select Copy. Are you on an emulator? Select Symlink. Do you know what Hard Links mean already? Select that if you think they're superior to Symlinks. |
| Deploy Layout | Whether or not UKMM includes a personalized folder when it merges mods out | Using with Atmosphere on a Switch or with the Atmosphere mod location for Switch emulators? Without Name. Otherwise, use With Name. |
| Auto Deploy | Whether UKMM will deploy mods automatically when you click Apply to merge them | Is your Output Folder set to a detachable drive like an SD card? Unchecked. Otherwise, checked. |
| Deploy rules.txt (Only WiiU) | Deploys a manifest file which allows Cemu to detect the UKMM files | Using with Cemu? Checked. Otherwise, unchecked. |
| Output Folder | Where to deploy the merged mod files to, for you to use | See the following list |
When you find the correct folder to use as your output folder, click in the address bar to highlight the path. Ctrl-C to copy the path. Ctrl-V to paste the path in the Output Folder.
Output folder locations:
- SD cards for WiiU:
X:\sdcafiine\00050000101C9?00(where X is the SD card drive letter, and ? is 4 for the US version, 5 for the EU version, 3 otherwise) - SD cards for Switch:
X:\atmosphere\contents(where X is the SD card drive letter). Do not put a title ID, UKMM adds title IDs in Switch mode - Cemu: If you're using Cemu 2.0-v91 or newer and didn't install your game/update/DLC with it, click File -> Open Cemu folder. Otherwise, open the folder with the Cemu.exe in it. In both cases, go into the folder called
graphicPacks. Use this folder. - RyujiNX: Right-click on BotW in the game list -> Open Mod directory. In the folder that opens, go up one folder, to the
contentsfolder. Use this folder. - Yuzu (and derivatives): Right click on BotW in the game list -> Open Mod Data Location. In the folder that opens, go up one folder, to the
load. Use this folder.
Usage
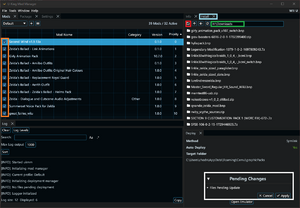
All tabs can be moved around and docked in one of the 4 quarters of the program, which can be resized.
- File: Contains the first method for installing mods. Also a way to exit the program.
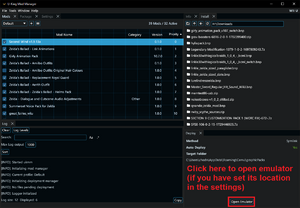
- Tools: Contains various options related to the mod files: perform a full remerge, cancel pending changes, or open various folders set in the Settings tab.
- Window: Contains check boxes for every tab. If you close a tab, this is where you can reopen it.
- Help: Contains the About window and a link to the UKMM documentation, which contains in-depth information about just about everything involved with UKMM.
- Mods tab: Contains all of your installed mods. Columns can be clicked to change sort type and direction. Boxes can be (un)checked to (de)activate mods.
- Package tab: Allows you to package a loose file mod as a UKMM zip. NOTE: UKMM zip layout is subject to change on minor version updates, so please be wary of distributing UKMM zips, as they may become uninstallable in future versions. (We believe we're done changing the layout, but there may be unforeseen issues in the future)
- Settings tab: See the above section for explanations of everything in here.
- Info tab: Contains mod description info. Also contains a button for re-selecting options without reinstalling, for mods that include options.
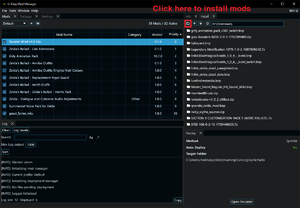
- Install tab: You can either select a mod in the file picker, or use the button to select a mod directly via the classic dialog.
- Log tab: Provides in-depth info about everything that happens when UKMM does anything related to mod files. Also contains information about any errors, if they happen.
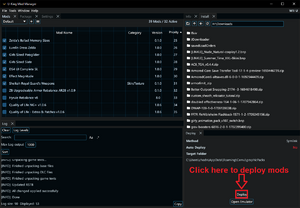
- Deploy tab: Contains information about the deploy method and folder, and a button to deploy merged mods to the output folder. NOTE: Button only appears if Auto Deploy is turned off.
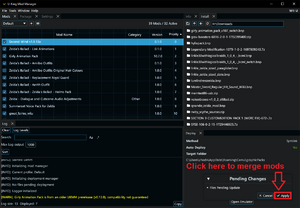
- Pending Changes: Review file changes if you'd like, use the Apply button to merge. NOTE: You don't have to merge every time you change anything. Change whatever you want to change, then Apply once.
No, really, how do I use it?
Known Issues
- Certain mods distributed as BNPs are incompatible with UKMM, due to how they were made. A fix is currently being worked on.
- In rare cases, installing a mod from a 7z file causes any custom text it adds to not get added. The cause of this is unknown. It can be worked around by extracting the 7z and installing the rules.txt file directly.
- In rare cases, installing a mod that does not edit the language you have set in your settings causes your entire game to change languages. The cause of this is unknown. It can be worked around by extracting the mod and deleting the language packs (located in
content/Packfor WiiU orromfs/Packfor Switch) you are not going to use.
If you can provide in-depth support to the developers on how to cause any of these issues, please contact Ginger on the discord. This would go a long way toward fixing them.
FAQ
What's the difference between merge/Apply and Deploy?
"Apply" and "merge" (or, "applying the merge") both mean to take the mods you have installed and combine them into one single mod. "Deploy" means to take the combined files and put them in the output folder.
UKMM splits these two concepts for multiple reasons. Maybe you want to merge a new set of mods and make sure there are no merge errors before you overwrite your deployed files. Maybe you have your output folder set to your SD card and want to merge while you look for your SD card, then plug it in to deploy. There are many reasons you might want these two operations separated.
If you don't want the operations separated, turn the Auto Deploy setting on, and it will always deploy right after merging (similar to what BCML did)
UKMM won't run on Linux!
glibc recently updated, which caused a whole big headache since we can't build against older versions. If you're on a system where you can upgrade, then perform a full system upgrade. (You probably want to do that periodically anyway) UKMM should work just fine after that.
If you're on Steam Deck, you're kinda outta luck, since steamOS uses a static distro of Arch Linux, so it can't upgrade. You could theoretically build the program on your Steam Deck and it'd use your native glibc, but most people will want to either use Wine to run the Windows version, or use a different computer.
Do I really need a game dump?
Yes.
Do I REAAAAAALLY need a game dump???
Still yes.
Why do I need a game dump?
BotW stores almost all of its files inside archives. Any given file you can look at using your file explorer will most likely contain dozens of files or more, each of which can contain hundreds of parameters inside it.
In order to properly merge mods, UKMM (and BCML before it) needs to know what the mod actually changes. So it has to compare the mod with the vanilla files in order to determine what is different, so that it can merge only those differences.
It also only stores those differences - and a mod you download from the internet may or may not be only a list of differences. UKMM needs the dump in order to recreate the actual mod files from those differences, once the mod changes have been merged.
There is no functional way around this. Every single mod manager does this on some level. Cyberpunk 2077 mods must be merged with game files. No Man's Sky mods must be merged into game files. Even Bethesda plugins contain only changes, which their games merge directly. Any games in the Unreal Engine do this with pak files, as well. There are only 2 reasons BotW is harder than any of these other games: it doesn't have an internal mechanism for merging, and it is normally on a console so there is no specific location on your computer where the tool can expect to find it.
Where is my game dump?
I don't know. Nobody other than you knows. The guide gives possible locations where it can be found, but at the end of the day, you're the one who put it on your computer, so you're the one who knows where it is.
But I really don't know where my game dump is!
Shouldn't be that hard to find, considering you chose exactly where, on your computer, it went when you dumped it. The only real reason for you not to know where the dump is, is if you pirated it. And piracy is not supported, so good luck!
Why aren't all BNPs compatible?
Some BNPs were made for BCML by directly editing log files, or by adding files to a game dump before generating the BNPs. Neither of these things were ever supported for BCML, and only worked by accident. Work is in progress to fix this in UKMM, but until then, certain BNPs cannot be installed with UKMM. If the mod has a regular graphic pack or loose file version, install that instead. Otherwise, bug the mod author about making their mods correctly.
Why is UKMM so hard to use?
We've received this feedback quite a bit, but nobody has ever been able to explain exactly what is hard to use about it, so we've never had any idea what to fix. If you have concrete suggestions about how to make it easier to use, please tell us on the discord.
UKMM's UI sucks! It makes me want to kill my mother!
Believe it or not, yes, this is actual feedback we've received.
BCML's UI was based on React, a JavaScript UI framework designed for websites. UKMM's UI is based on egui, a functional UI framework designed for utilitarian programs. UKMM will likely never look as flashy as BCML did. Instead, it will look much like most other mod managers and computer programs do. We're sorry, but we take no responsibility for any harm that comes to any mothers.
Why did you write this program in Rust? Rust is the product of Lovecraftian madmen!
Yes, this was also actual feedback.
Rust is a fairly fast and easy-to-use language that is based heavily on C++, which a lot of the code libraries we needed to use were written in, so we could access the C++ code easily. C# was another choice, but it would have been more difficult to use existing code libraries.
