Help:Sound modding
You'll need to understand the files in this game and how they work to get a good grasp on what you need to do to achieve the goals you want. This guide will show you how replace simple tracks in the game with ones you want. An illustrated guide can be found here To replace bigger/more complex tracks, follow the advanced guide here (tutorial incomplete/not made yet).
To see what can be done in music modding and have a reference point, there are examples such as Lylah's Complete Music Overhaul which has modded over 210 music files in the game that function just how the base game's files do, employing the methods found here.
The 4 main sound files
There are 4 types of files you mostly need to concern yourself with in music modding:
- BFSTM (.bfstm) "Binary Cafe Stream" files
- BFSTP (.bfstp) "Binary Cafe Stream Prefetch" files
- BFWAV (.bfwav) "Binary Cafe Wave" files
- Bars (.bars) files
BFSTMs are the main music files in this game, which you can find under content/Sound/Resource/Stream in the unpacked base game folder and DLC music in the Update Data folder. When making a mod, always treat it as an 'update' so anything you make goes in one 'content' file structure.
BFSTPs are essentially the precursor of BFSTMs. A lot of BFSTMs can't play immediately as the game has to load them in, so in order to avoid that, there are "prefetch" files for each of these BFSTMs that contain compressed data of their respective file and only play for 1 second before switching over to the BFSTM to play the rest. These are known as BFSTPs.
BFWAVs are another type of music file that are only for smaller sounds, short events, almost every sound effect in the game, etc.
All BFWAVs and BFSTPs are contained within Bars files. Bars files are simply containers for these files, and can contain multiple BFSTPs or BFWAVs within them if they concern one object/category (e.g: Guardian sword sfx). These can be found under content/Sound/Resource in the update folder for the game data.
IMPORTANT: This game's sound files have a sample rate 32000Hz. The music you get from Youtube and most MP3s are usually in 44100Hz or above, so make sure to convert before you start working on your new files. All your music mods should be in 32000Hz sample rate to avoid distortions and glitches.
For simple files, such as the one that plays near the Temple of Time, you only need to worry about 1 BFSTM file. In this case: the file would be BGM_Spot_TempleOfTime.bfstm. This goes for other BGM_Spot files you may want to mod. However, if you want to replace the music for things that can start spontaneously, such as a Guardian battle (Stalkers/Skywatchers), that has at least 5 files associated with it: BGM_Guardian_main.bfstm, BGM_Guardian_outro.bfstm, and GuardianBGM.bars which contains BGM_Guardian_main.bfstp and BGM_Guardian_outro.bfstp.
This guide will go through how to replace the Temple of Time music as an example, and then the Guardian BGM later as it needs more steps. To mod only the former, only the 1st and 2nd resources listed below are required, but it is recommended to obtain everything in the list to make modding simpler in the future.
Prerequisites
- A music editing software of your choice, e.g: Wavepad Sound Editor or Audacity
- Looping Audio Converter
- bfstp fixer
- BCFSTM-BCFWAV Converter
- Python 3.7
- Bars Tool
- VLC Media player for previewing BFSTM files (not necessary but highly recommended)
- NW4F Wave converter for converting Wav files to BFWAV
- Foobar2000 Media Player and vgmStream plugin for previewing/converting BFWAV files
Creating a new sound
Using the Temple of Time as an example, the fundamentals of this guide apply to any future tracks you make in terms of looping.
First, preview the actual original game file you're replacing so that you are aware of how long it is and what constraints you should roughly keep your new file in (there's nothing wrong with making a loop a minute or so longer than normal for BGM_Spots, but it is not recommended for other tracks as it may function abnormaly).
Creating a loop
Assuming you have a file or sample you want to use, open it up in a sound editor or software of your choice. This guide uses Wavepad, as it is perfect for this type of editing.
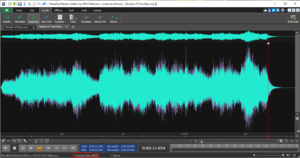
Editing the sound
Make the edits as you wish to your file, such as volume adjustment (ideally near the original file's), reverb, fades, equalising, mixing, etc. If the file is very 'droney' (like a choir) with little percussion or fades out, you can do an easy trick as shown below.
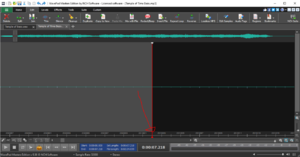
Select a portion of the beginning of the song, find out precisely what sample you have selected it to (A sample is the most precise unit of song editing, as milliseconds are too imprecise here), and note it down. Then copy/paste your selection onto a new file and give it a fade in. After that, copy that file and paste mix it into the last part of the original song you are using so the intro fades in while the outro fades out. Make a note of where your new endpoint for the song is (in samples, not milliseconds), and delete any excess space after that.
IMPORTANT: When you are creating a loop, you must ensure that the start point and end point of the loop are ideally when the wave form reaches 0 amplitude, and one wave is coming up while the other is going down, to ensure optimal flow. This is how you achieve seamless loops. Failure to adhere to these principles means skips, clicks, 'pops' or static will be heard when the song loops.
Save your file as a .wav and then open it up in Looping Audio Converter.
Entering loop data
When opening Looping Audio Converter, the setup should remain relatively untouched apart from 3 areas:
- Save directory (can be anywhere you want that's the easiest to access)
- Output Format (should be BFSTM)
- Loop Information option (should be set to 'Ask for all files')
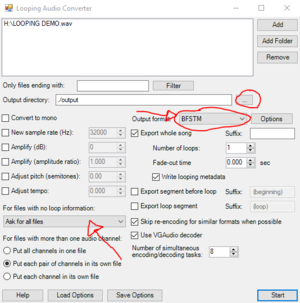
Click 'Start' and then a prompt should appear allowing you to enter your loop data in samples, which will be simple since you made a note of the points earlier. Ensure the 'Enable' and 'Loop' boxes are checked, and click 'Okay'. This should output your wav as a BFSTM with the loop data written onto it. Rename your new track to the original name of the track you wanted to replace. It is now ready to be used in your mod. BFSTMs are stored under content/Sound/Resource/Stream.
Tracks that require a prefetch (.bfstp)
Some tracks need to be loaded in by a one-second prefetch that contains compressed data of the BFSTM, and you can find these by analysing the list of .bars file to see if your track has one. All sound effects and battle themes have a bfstp stored inside a respective .bars file, e.g: GuardianBGM.bars contains the prefetches for the main Guardian theme and outro. Assuming you followed the same looping steps as mentioned above, you should have a Guardian_Main theme that loops, and a Guardian_Outro that does not loop (select 'Keep as non-looping' in Looping Audio Converter). Once the new BFSTMs have been made, you should follow the bfstp fixer method, where you place bfstpfixer.py, BCFSTM-BCFWAV-Converter, your BFSTMs, and a .bat file with the following code:
for /r %%i in (*.bfstm) do python main.py -format FSTP -bom 0 "%%i" for /r %%i in (*.bfstp) do python bfstpfixer.py "%%i"
in the same directory and run the .bat file. This should output 2 new files for each BFSTM you had. Keep the .bfstps that have 'fixed' at the end of their name.
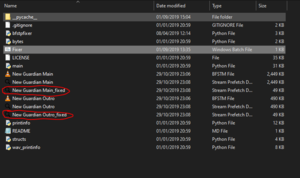
Make a copy of the .bars file you want to modify and place it somewhere safe to work with to avoid accidentally tampering with the game's core files. Open up the new copy of the .bars file and observe the names of the specific files you want to replace. They should have a similar or identical name to the BFSTMs they are made for. Rename your new files to these names respectively, and then click 'Replace' for every file you are replacing.
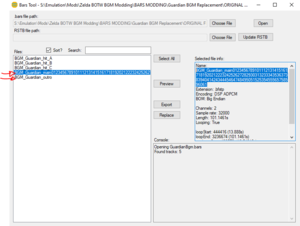
A backup .bars file will be generated once you do so that contains the bars data before you made any edits, and the original file is now updated with your new data. Place the modified bars file into content/Sound/Resource of your mod folder, and your BFSTMs in content/Sound/Resource/Stream, and you should now have a working music mod without any glitches or abnormalities.
Sound effects (SFX) and BFWAVs
Almost every sound effect in the game is in .bfwav format, and are also stored in .bars files. Any replacement BFWAV you make has to be the shorter than or the exact same length as the original file you are modding, which you can check by opening it in Foobar2000. Assuming you have made your new sound effect in .wav format comply with this, you can simply drag it over the NW4FWaveConverter.exe and it should output a new bfwav of your file. Then, using the Bars tool as previously mentioned, replace the old bfwav with your new one and implement the new .bars file into your mod.